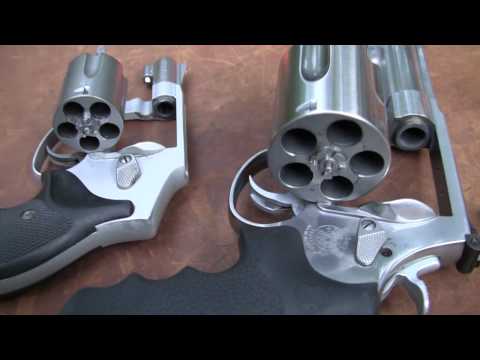
Taurus Raging Bull Model 444 Close up

Published on December 22, 2022
Duration: 3:24

This review of the Taurus Raging Bull Model 444 highlights its substantial size and .44 Magnum power. Hickok45 demonstrates effective target practice in both single and double-action modes, emphasizing the importance of the gun's weight for recoil management. The video also showcases the unique dual cylinder latches and the firearm's accuracy, even at longer distances.

Quick Summary

The Taurus Raging Bull Model 444 is a .44 Magnum revolver known for its substantial size and accuracy. Its weight aids in recoil management, and unique features like dual cylinder latches enhance safety during handling and reloading.

Chapters

  1. 00:00Introduction & Loading the .44 Magnum
  2. 00:18Target Practice: Cans & Bottles
  3. 00:59Reloading & Dual Cylinder Latches
  4. 01:46Accuracy Test & Close-Up Details

Frequently Asked Questions

What caliber is the Taurus Raging Bull Model 444?

The Taurus Raging Bull Model 444 reviewed here is chambered in the powerful .44 Magnum caliber. This large-frame revolver is designed to handle the significant energy and recoil associated with this potent cartridge.

What are the key features of the Taurus Raging Bull Model 444?

Key features include its robust stainless steel construction, a long barrel (8.375 inches), a 6-round capacity, dual cylinder latches for enhanced safety, and cushioned grips to help manage recoil.

How does the weight of the Raging Bull affect shooting?

The substantial weight of the Taurus Raging Bull Model 444 plays a significant role in managing the recoil of .44 Magnum ammunition. This helps maintain control and improve shooter comfort during firing.

Can the Taurus Raging Bull Model 444 shoot accurately?

Yes, the video demonstrates that the Taurus Raging Bull Model 444 is capable of impressive accuracy, even when engaging targets at longer distances. Its design contributes to stable shooting.

Related News

All News →

More Reviews Videos You Might Like

More from hickok45

View all →