Brownells - RAT Grips - SPRR Grip for Pistols

Published on September 29, 2010
Duration: 3:43

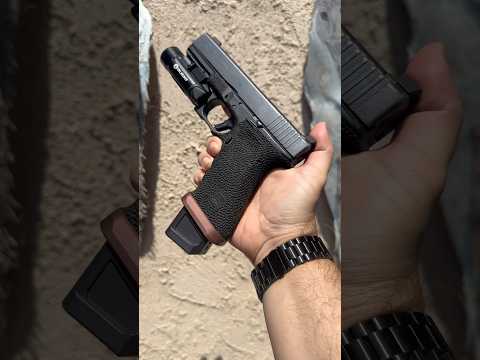
This guide details the step-by-step process for installing a heat-shrink grip sleeve, such as the RAT Grips SPRR Grip, onto a firearm or other item. It emphasizes proper heating, application, molding, and texturing techniques to ensure a secure and functional grip. The instructions are geared towards intermediate users familiar with firearm customization.

Quick Summary

To install a heat-shrink grip sleeve, wet the surface, pre-cut the sleeve, heat it, and apply. Ensure complete contact, then reheat to manipulate edges and mold texture with a damp hand and cloth. Allow cooling before final trimming for a secure, custom grip.

Chapters

  1. 00:11Step 1: Prepare Surface
  2. 00:19Step 2: Cut and Heat Grip
  3. 00:32Step 3: Apply Grip
  4. 00:52Step 4: Press Grip
  5. 01:13Step 5: Heat Outside
  6. 01:32Step 6: Manipulate Material
  7. 01:49Step 7: Mold Impression
  8. 02:18Step 8: Apply Texture Cloth
  9. 02:30Step 9: Create Texture
  10. 02:53Step 10: Cool Down
  11. 03:12Step 11: Trim and Touch-up
  12. 03:39Thank You

Frequently Asked Questions

How do you properly apply a heat-shrink grip sleeve like the RAT Grips SPRR?

The process involves wetting the surface, pre-cutting the sleeve to size, heating it, and carefully applying it. Ensure complete contact, then heat the outside again to manipulate and thin edges. Mold your impression with a damp hand, apply a texture cloth, and allow it to cool before final trimming.

What are the key steps for ensuring a good adhesion and finish when installing a heat-shrink grip?

Key steps include ensuring complete contact of the grip to the surface, manipulating the material to thin edges for no snagging, and using a damp hand or cloth to mold the impression and create texture. Proper cooling before removing the texture cloth is also vital.

Can I customize the texture of a heat-shrink grip sleeve?

Yes, you can customize the texture by using a damp texture cloth. After heating and applying the grip sleeve, wrap the damp cloth around it and press firmly to create your desired textured pattern for improved handling.

More Gunsmithing & DIY Videos You Might Like

More from Brownells, Inc.

View all →