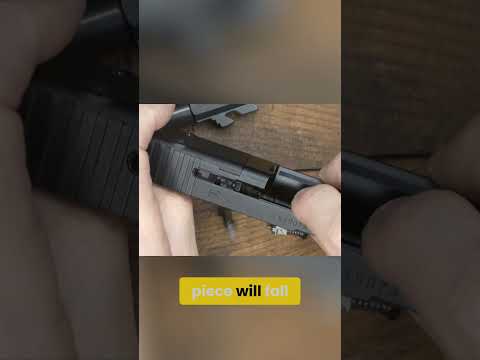
Pistol Painting

Published on September 30, 2016
Duration: 4:17

This video demonstrates how to paint a Glock 19 pistol for personalization and protection. Key steps include thorough masking of non-paintable areas like optics and lights, degreasing with Slip 2000 725 for adhesion, applying a sand base coat, and a matte clear coat for durability. Camouflage patterns are layered using stencils like camo netting, with a final 'dusting' to break up lines.

Quick Summary

Learn to paint your pistol by first masking optics and lights, then degreasing with Slip 2000 725. Apply a sand base coat, followed by a matte clear coat for durability. Layer camouflage colors using stencils like camo netting, and finish by dusting with sand to break up lines.

Chapters

  1. 00:00Introduction to Pistol Painting
  2. 00:33Preparation and Masking Steps
  3. 01:25Applying Base Coat and Clear Coat
  4. 02:12Camouflage Layering Techniques
  5. 03:13Finished Pistol and Benefits

Frequently Asked Questions

What are the essential preparation steps for painting a pistol?

Begin by meticulously masking off all areas you don't want painted, such as optics, sights, and light lenses. Then, thoroughly degrease the entire firearm surface using a suitable solvent like Slip 2000 725 to ensure the paint adheres properly.

How can I make the paint job on my pistol more durable?

Apply an even sand-colored base coat, let it dry completely, and then apply a matte clear coat. This clear coat acts as a protective layer, ensuring the base color remains intact even if the camouflage layers wear off over time.

What materials are recommended for pistol painting?

For this project, Rust-Oleum Camouflage spray paint in sand was used for the base, along with Rust-Oleum Ultra Cover 2X Matte Clear for protection. Slip 2000 725 degreaser is recommended for surface preparation.

What are the benefits of painting a firearm?

Painting a firearm offers several advantages, including personalization to match user preference or environment, enhanced scratch and corrosion resistance, and potentially improved handling characteristics in extreme heat due to the matte finish.

Related News

All News →

More Gunsmithing & DIY Videos You Might Like

More from Kit Badger

View all →