TAC-TV's Full Length Wilson Combat Episode

Published on March 28, 2013
Duration: 31:17

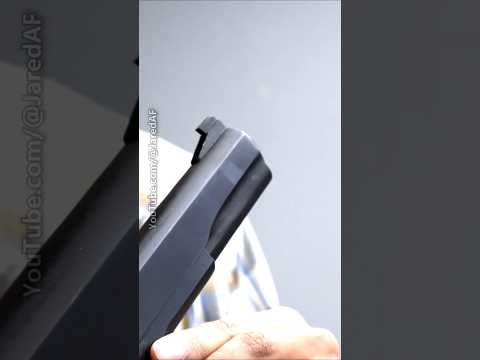
This episode of TAC-TV provides an in-depth look at the meticulous process of building a Wilson Combat CQB 1911 at their Berryville, Arkansas facility. Host Larry Vickers, a trained firearm's professional, guides viewers through the multi-stage assembly, from initial parts fitting and trigger work to finishing and rigorous test firing. The segment highlights the dedication to quality and craftsmanship involved in creating these high-end handguns.

Quick Summary

Wilson Combat builds its CQB 1911s through a detailed process including A-Op and B-Op stages for component fitting, specialized trigger work set to approximately 3.75 pounds, and thorough test firing with multiple ammunition types to ensure reliability.

Chapters

  1. 00:00Introduction with Larry Vickers
  2. 00:45Visiting Wilson Combat in Berryville, Arkansas
  3. 01:15Wilson Combat's Growth and Bill Wilson's Vision
  4. 02:24Passion for High-Quality, Accurate Handguns
  5. 03:29The Complexity of 1911 Assembly
  6. 04:26Quality-Driven vs. Production-Driven Company
  7. 04:29Customer Service Philosophy
  8. 05:45Wilson Combat Sponsorship and History
  9. 07:53Interview with Bill Wilson
  10. 08:14Bill Wilson's Start in the 1911 Business
  11. 09:21Transition from Watchmaking to Gunsmithing
  12. 10:23Wilson Combat's Success Factors
  13. 11:11Preparing for Range Practice
  14. 14:03Range Practice with Bill's Blaster
  15. 14:59Testing a Compact 1911 with Flat Wire Spring
  16. 15:47Shooting Ryan's Personal .45 ACP Blaster
  17. 16:17Transition to Long Guns
  18. 16:19Shooting the 7.62 x 40 Caliber
  19. 17:17Testing the .458 SOCOM Rifle
  20. 18:17Exploring the 6.8 SPC Long Gun
  21. 19:17Best All-Around AR Platform Cartridge
  22. 19:30Back to the Shop: Gunsmithing Process
  23. 21:40Building a Wilson CQB with Greg Martin
  24. 22:30The A-Op Operation
  25. 23:17The B-Op Operation
  26. 23:40Trigger Work Station
  27. 24:30The Prep Station
  28. 25:16Finishing Process
  29. 25:35Final Assembly
  30. 26:42Test Fire Range
  31. 27:20Cleanup and Wrap Up
  32. 28:58Conclusion and Website Plug

Frequently Asked Questions

What are the main stages in building a Wilson Combat CQB 1911?

The build process involves several key stages: kit assembly, A-Op (slide/frame fit, barrel, slide stop), B-Op (internal components like extractor, firing pin stop), trigger work, prep for finishing, the finishing process itself (bluing, Armor-Tuff, etc.), final assembly, and rigorous test firing.

How does Wilson Combat ensure the quality of its firearms?

Wilson Combat employs a multi-faceted quality control approach. This includes meticulous hand-fitting of parts, specialized gunsmithing operations, setting triggers to precise weights, and comprehensive test firing of every firearm with multiple ammunition types to guarantee reliability.

What is the typical trigger pull weight for a Wilson Combat 1911?

Trigger jobs performed by Wilson Combat gunsmiths are generally aimed at achieving a pull weight of approximately 3.75 pounds. This precise weight is achieved through careful adjustment and tuning by experienced technicians.

How long does it take to prepare a Wilson Combat 1911 for finishing?

The prep station at Wilson Combat dedicates about three hours to prepare a standard five-inch CQB model for its final finish. This includes ensuring all surfaces are ready for bluing, Armor-Tuff, or other coatings.

Related News

All News →

More Gunsmithing & DIY Videos You Might Like

More from Wilson Combat

View all →