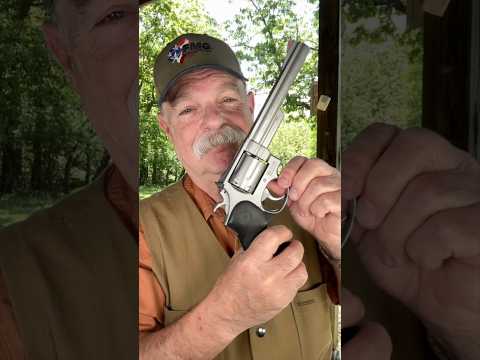
Firearms Refinishing: Getting The Bead Blasted Finish (repost)

Published on December 16, 2013
Duration: 6:43

This video demonstrates how to achieve a non-reflective bead blasted finish on a firearm's top strap, specifically a Colt Magnum Carry, to reduce glare. It covers preparing the surface by sanding out imperfections, meticulous masking of internal components, and the bead blasting process itself using an 80-grit glass bead abrasive. The tutorial emphasizes safety precautions like wearing a respirator and eye protection, and concludes with the successful application of a smooth, satin finish.

Quick Summary

Bead blasting creates a non-reflective, satin finish on firearms, ideal for reducing glare on sight lines. Proper preparation includes wet sanding imperfections and masking internal parts. Use 80-grit glass beads with a compressor capable of 100 PSI, always wearing a respirator and eye protection.

Chapters

  1. 00:00Intro: Goal of Refinishing & Flaws
  2. 00:54Sanding Out Surface Imperfections
  3. 02:13Masking & Protecting Internal Parts
  4. 02:38Equipment & Media Overview
  5. 04:15Bead Blasting Process & Safety
  6. 04:38Cleanup & Final Results

Frequently Asked Questions

What is the purpose of bead blasting a firearm's finish?

Bead blasting is used to create a non-reflective, satin finish on firearms. This is particularly useful for reducing glare on surfaces like the top strap, which can interfere with sighting during shooting.

What grit of glass bead is recommended for a satin firearm finish?

For a desirable satin finish, an 80-grit glass bead abrasive is commonly recommended. If a more matte surface is desired, other media like garnet might be considered.

What safety precautions are necessary when bead blasting a firearm?

It is crucial to wear a respirator to avoid inhaling fine glass dust and clear safety glasses to protect your eyes. Proper ventilation is also important during the process.

How should a firearm be prepared before bead blasting?

Preparation involves thoroughly cleaning the firearm and sanding out any surface imperfections or factory finishing lines using fine-grit sandpaper (e.g., 320-grit) with oil. Meticulous masking of all internal parts and sensitive areas is also critical.

More Gunsmithing & DIY Videos You Might Like

More from TheYankeeMarshal

View all →