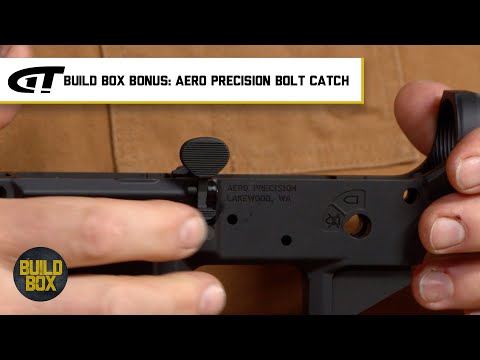
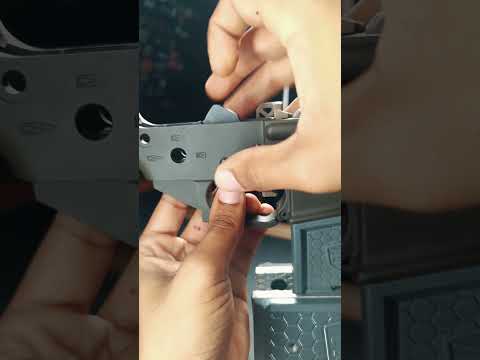
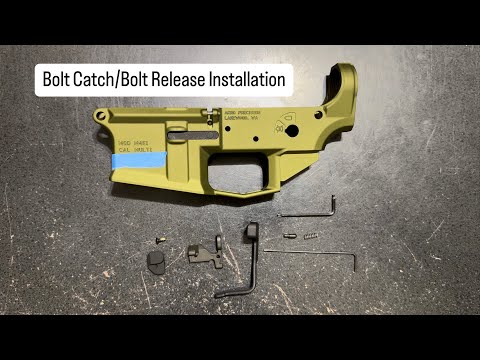
How To Install a Bolt Catch Assembly on AR Rifles

Published on February 9, 2024
Duration: 3:48

This guide details the installation of an AR-15 bolt catch assembly, a crucial step in completing your rifle build. It outlines the necessary tools, including specific punch sizes and a mini hammer, and provides a four-step process for securely fitting the bolt catch, spring, plunger, and roll pin. The video emphasizes using specialized starter punches to prevent damage to the receiver.

Quick Summary

Install an AR-15 bolt catch assembly using a 1/16-inch punch, 3/32-inch roll pin punch, needle-nose pliers, and a mini hammer. Start the roll pin, insert the spring and plunger, then hold the bolt catch with the 1/16-inch punch while driving the roll pin through.

Chapters

  1. 00:00Introduction to Bolt Catch Installation
  2. 00:22Recommended Tools for Installation
  3. 00:47Smart Tool Tip: Starter Roll Pin Punches
  4. 01:35Step 1: Starting the Roll Pin
  5. 02:30Step 2: Installing Spring and Plunger
  6. 02:37Step 3: Positioning the Bolt Catch
  7. 02:51Step 4: Driving the Roll Pin
  8. 03:17Next Steps and Related Videos

Frequently Asked Questions

What tools are needed to install an AR-15 bolt catch assembly?

You will need a 1/16-inch punch, a 3/32-inch roll pin punch (preferably with a starter tip), needle-nose pliers, and a mini hammer (plastic or brass) for installing an AR-15 bolt catch.

How do you start the roll pin for an AR-15 bolt catch?

To start the roll pin, use needle-nose pliers or a starter punch to hold it steady. Then, gently tap it into the receiver with a rubber or plastic hammer until it's partially seated.

What is the correct order for installing the AR-15 bolt catch components?

First, insert the bolt catch spring into the lower receiver, followed by the plunger. Then, position the bolt catch and use a 1/16-inch punch to hold everything in place before driving the roll pin.

Can I damage my AR-15 receiver when installing the bolt catch?

Yes, improper tool use can scuff or damage the receiver. Using a starter punch for the roll pin and a plastic or brass hammer helps prevent cosmetic damage.

Related News

All News →

More Gunsmithing & DIY Videos You Might Like

More from AT3 Tactical

View all →