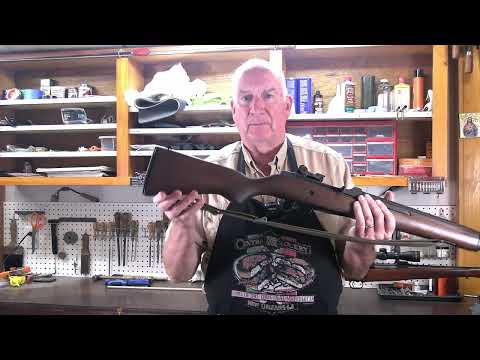
M1A Gen4 Scope Mount Installation

Published on February 13, 2020
Duration: 5:02

This guide details the installation of the Springfield Armory Gen4 Aluminum Scope Mount on an M1A rifle. It covers necessary tools, disassembly of the rifle's stock and receiver, removal of the old stripper clip guide, installation of the new mount with precise seating instructions, and final reassembly. The video emphasizes proper fitment and secure mounting for optimal accuracy.

Quick Summary

The Springfield Armory M1A Gen4 Aluminum Scope Mount installation requires specific tools like punches, a mallet, and wrenches. Proper seating is achieved by striking the mount with a mallet while tightening screws to ensure accuracy. Always ensure the firearm is unloaded before beginning any maintenance or installation procedures.

Chapters

  1. 00:00Safety Warning
  2. 00:12Introduction and Tools
  3. 00:30Disassembly
  4. 00:45Removing Original Stripper Clip Guide
  5. 01:06Installing New Stripper Clip Guide
  6. 02:25Mounting the Scope Base
  7. 02:58Seating the Mount
  8. 03:34Final Hardware and Windage
  9. 04:29Reassembly

Frequently Asked Questions

What tools are needed to install the Springfield Armory M1A Gen4 Scope Mount?

You will need a large flathead screwdriver, a triangular file, 3/32" and 1/4" punches, a 3/4" wrench, and a mallet. Ensure you have these tools ready before beginning the installation process.

How do you ensure the M1A Gen4 scope mount is properly seated for accuracy?

Proper seating involves striking the mount with a mallet both forward and rear of the mounting screw while tightening it. Continue this process until the screw cannot be tightened further, ensuring a solid lock-up.

What is the first safety step before installing the M1A Gen4 scope mount?

Before starting any work, always ensure the firearm is unloaded. Remove the magazine and visually and physically check the chamber to confirm it is empty.

Can the rear screw bushing on the M1A Gen4 mount be adjusted?

Yes, the rear screw bushing can be adjusted. This adjustment allows you to change the point of impact for windage, enabling precise zeroing of your optic after installation.

Related News

All News →

More Gunsmithing & DIY Videos You Might Like

More from SPRINGFIELD ARMORY

View all →