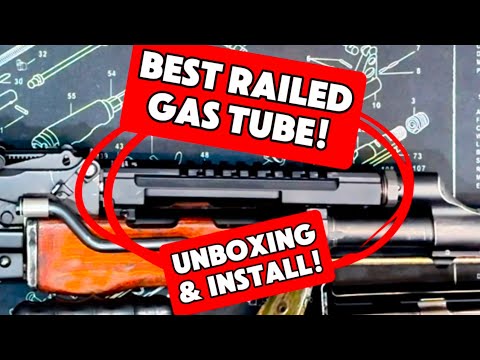
Troy Industries AK47 rail (Full length) installation video

Published on July 21, 2014
Duration: 15:23

This video details the installation of the Troy Industries full-length AK47 rail and railed gas tube. It covers necessary tools, pre-installation tips like attaching rail sections and heat-resistant 'squids', and the critical steps of fitting the lower handguard and adjusting internal tension blocks. The installation of the adjustable upper railed gas tube and final securing with a castle nut are also demonstrated, emphasizing the importance of marking for monitoring looseness.

Quick Summary

The Troy Industries full-length AK47 rail installation requires a hammer, 3.0mm hex bit, punch, and screwdrivers. Pre-installation involves attaching rail sections and heat-resistant 'squids'. The most complex step is adjusting internal tension blocks, followed by fitting the adjustable upper railed gas tube and securing it with a marked castle nut.

Chapters

  1. 00:00Introduction and Tools
  2. 01:45Pre-installation Tips
  3. 03:09Lower Handguard Installation
  4. 05:12Tension Block Adjustment
  5. 09:05Upper Railed Gas Tube Installation
  6. 12:56Final Securing and Marking

Frequently Asked Questions

What tools are needed to install the Troy Industries AK47 full-length rail?

You will need a hammer, a 3.0mm hex bit, a punch, and screwdrivers. A flexible hex extension is also recommended for easier installation of the rail system.

What are pre-installation tips for the Troy AK47 rail?

Before mounting, attach short rail sections and heat-resistant 'squids' to the handguard. This prevents struggling with screws later and protects your hands from heat.

What is the most challenging part of installing the Troy AK47 rail?

The most complex step involves adjusting two internal tension blocks using set screws. These blocks interface with the rifle's original front handguard retention bracket, requiring careful seating.

How is the Troy upper railed gas tube installed and secured?

The upper rail replaces the standard gas tube and is adjustable for length. After fitting, a small castle nut is tightened to lock it in place, and a witness mark is recommended to monitor for loosening.

Related News

All News →

More Gunsmithing & DIY Videos You Might Like

More from AK Operators Union, Local 47-74

View all →