SHTF 2026: ARE YOU ACTUALLY READY?

Published on March 28, 2026
Duration: 51:12

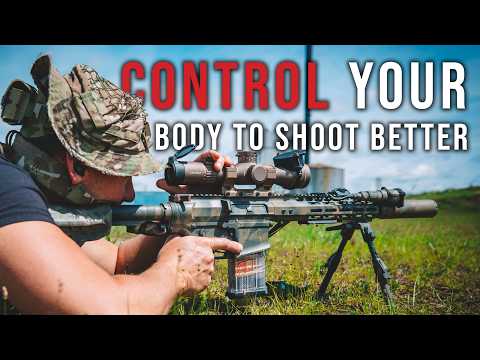
This video provides a comprehensive guide to zeroing firearms and confirming zero, emphasizing methodical steps for accuracy. It details techniques for establishing a natural point of aim, performing MOA calculations, and making precise adjustments to optics. The instruction highlights the importance of consistent practice and understanding weapon mechanics for reliable performance in various scenarios.

Quick Summary

Expert firearm zeroing involves firing three five-round groups at your chosen distance, calculating MOA adjustments, and re-confirming zero. Techniques like natural point of aim and understanding height over bore are crucial for accuracy, especially in close-quarters engagements.

Chapters

  1. 00:07Introduction & Range Day Setup
  2. 01:16Firearm and Pistol Loadouts
  3. 03:04Confirming Firearm Zero Procedure
  4. 04:07Natural Point of Aim & Building Your House
  5. 06:01MOA Math & Optic Adjustments
  6. 07:10Making Optic Adjustments
  7. 10:00Zeroing Adjustments & 300m Zero Goal
  8. 11:36Purpose of Grouping Exercises
  9. 12:09Final Zero Confirmation Shots
  10. 13:39Why Train in Kit?
  11. 14:53Assessing Nighthawk's Rifle Zero
  12. 15:20Pistol Shooting Technique
  13. 16:18Adjusting Nighthawk's Mark 18
  14. 17:10Trigger Control & Grip Fundamentals
  15. 18:13Finger Placement on Trigger
  16. 19:21Optic Internal Setting Adjustments
  17. 21:58One Reload Two Drill
  18. 26:08Importance of Training in Kit
  19. 26:28High Ready vs. Low Ready Positions
  20. 26:56Two Two Reload Two Drill
  21. 29:48Post-Engagement Weapon Status Check
  22. 31:02Failure Drill (Two Chest, One Groin, One Head)
  23. 32:49Height Over Bore Explained
  24. 34:54Failure Drill with Multiple Targets
  25. 36:57Importance of Gloves with Suppressed Firearms
  26. 37:25Bill Drill
  27. 38:24Pistol Drills Recap
  28. 40:02Pistol Drills & Safety Checks
  29. 41:18Nighthawk's Thoughts on Mark 18
  30. 41:45Rifle Barrel Length Considerations for Women
  31. 43:59Defensive Drill: Two Chest, One Groin, One Head
  32. 45:15High Ready Drill
  33. 47:46Confirming Zero at 100 Meters
  34. 49:11Shooting from Unconventional Positions
  35. 50:29Final Thoughts & Key Takeaways

Frequently Asked Questions

What is the recommended procedure for zeroing a firearm?

The recommended procedure involves firing three five-round groups at your chosen distance (e.g., 25 meters) to confirm zero. After analyzing the group for MOA, make adjustments to your optic based on its increments. Re-fire groups to confirm the adjustments and achieve your desired zero, such as a 300-meter zero by aiming low at 25 meters.

Why is it important to train in tactical gear (kit)?

Training in kit is crucial because body armor and other gear affect how a firearm interfaces with your body. It simulates real-world conditions, ensuring you can effectively manipulate and shoot your weapon while wearing the equipment you would actually use in a defensive or tactical situation.

What is the 'failure drill' in firearms training?

The failure drill is a tactical engagement sequence used when a threat does not stop after initial shots. It typically involves firing two rounds to the chest, one to the groin, and one to the head to ensure the threat is neutralized.

How does height over bore affect shooting?

Height over bore is the distance between your muzzle and your optic. In close-quarters engagements, this difference means you need to aim slightly higher than your intended point of impact to compensate for the optic's elevation above the barrel, ensuring rounds hit the target.

What are essential drills for improving firearm proficiency?

Essential drills include confirming zero regularly, practicing transitions from primary to secondary weapons ('one reload two'), timed drills like 'two two reload two,' and tactical sequences like the 'failure drill' for engaging threats effectively.

More Training & Techniques Videos You Might Like

More from Trench Grenade

View all →