How To Install a Two Stage Triggers & Drop In Triggers on AR Rifles - Tips & Tricks

Published on March 8, 2024
Duration: 4:10

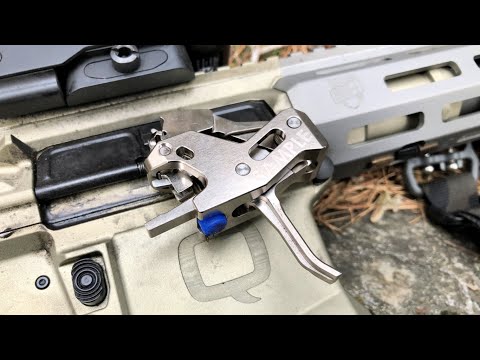
This guide provides an abbreviated installation process for two-stage and drop-in cassette triggers on AR-15 style rifles. It highlights key differences, such as the disconnector assembly in two-stage triggers and the importance of anti-walk pins for cassette triggers. The video emphasizes that installation steps are similar to single-stage triggers, with a focus on ease of use for drop-in designs.

Quick Summary

Installing AR-15 two-stage and drop-in cassette triggers requires basic tools like a 5/32 inch punch and hammer. Anti-walk pins are essential for cassette triggers to prevent standard pins from dislodging. Two-stage triggers may have a disconnector with a back shelf for tension, differing from single-stage designs.

Chapters

  1. 00:00Intro: Two-Stage & Drop-In Triggers
  2. 00:52Two-Stage Trigger Installation Overview
  3. 01:13Disconnector Differences
  4. 02:10Cassette Drop-In Triggers & Anti-Walk Pins
  5. 02:54Key Installation Tips for Cassette Triggers
  6. 03:46Next Steps: Safety Selector & Trigger Grading

Frequently Asked Questions

What are the essential tools for installing AR-15 triggers?

You'll need basic tools like a 5/32 inch punch and a hammer. A vise or vise block can also be helpful for securing the lower receiver during the installation process.

Why are anti-walk trigger pins important for drop-in triggers?

Anti-walk pins are crucial for cassette-style drop-in triggers because they prevent the standard mil-spec pins from loosening or falling out during firing, ensuring reliable operation and preventing damage.

What is the main difference between two-stage and single-stage AR-15 triggers during installation?

The primary installation difference often involves the disconnector and spring assembly. Some two-stage triggers feature a back shelf to hold these components under tension, unlike most single-stage designs.

How can I make installing anti-walk pins easier?

To simplify the installation of anti-walk pins, it's recommended to thread one screw into each pin on one side as far as your finger can comfortably take it before attempting to seat the pins in the receiver.

More Gunsmithing & DIY Videos You Might Like

More from AT3 Tactical

View all →