JAKL - Disassembly

Published on May 17, 2022
Duration: 2:16

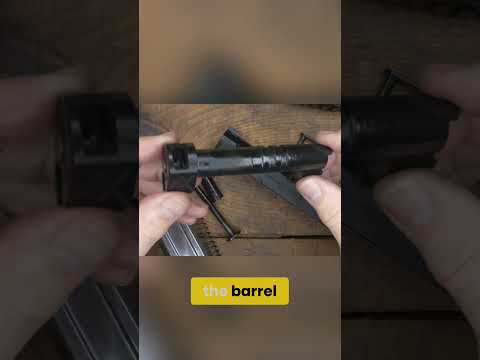
Matt from Palmetto State Armory provides a clear, step-by-step guide on how to disassemble and reassemble the JAKL firearm. The demonstration emphasizes safety protocols, including ensuring the firearm is unloaded and handled in a safe direction throughout the process. Key steps involve separating receivers, removing the recoil assembly and bolt carrier group, and then reversing the process for reassembly.

Quick Summary

To disassemble the JAKL, first ensure it's unloaded. Undo the take-down pivot pin to separate receivers. Press down on the recoil assembly to remove it. Turn the firearm upside down, pull the charging handle rearward, and remove the carrier. Finally, tip the gun to remove the charging handle sled.

Chapters

  1. 00:00Introduction and Safety
  2. 00:20Disassembly Steps
  3. 00:33Removing Recoil Assembly
  4. 00:46Removing Bolt Carrier Group
  5. 00:56Removing Charging Handle
  6. 01:08Reassembly Steps
  7. 01:16Installing Charging Handle Sled
  8. 01:24Installing Charging Handle
  9. 01:40Installing Bolt Carrier Group
  10. 01:48Installing Recoil Assembly
  11. 02:00Final Assembly
  12. 02:08Conclusion

Frequently Asked Questions

What are the first steps to disassemble the JAKL firearm?

First, ensure the JAKL is unloaded and pointed in a safe direction. Then, undo the take-down pivot pin to separate the lower receiver from the upper receiver.

How do you remove the recoil assembly from the JAKL?

To remove the recoil assembly, use your thumb to press down on the back of the assembly. This action will cause it to pop out, allowing you to pull it completely out of the firearm.

What is the procedure for removing the bolt carrier group from the JAKL?

Turn the JAKL upside down. Pull the charging handle rearward until the back of the carrier protrudes from the receiver. Then, grasp the carrier and pull it straight out.

How is the charging handle and sled removed from the JAKL?

After removing the bolt carrier group, tip the JAKL upside down. The charging handle sled should then come out of the receiver.

Related News

All News →

More Gunsmithing & DIY Videos You Might Like

More from Palmetto State Armory

View all →