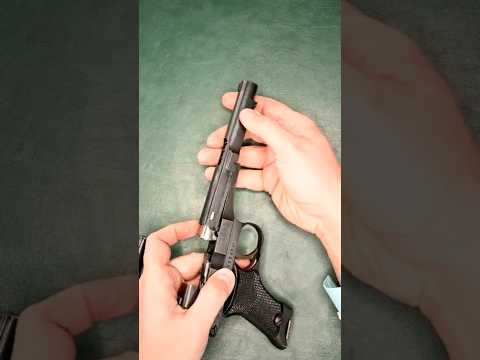
P95 Disassembly

Published on July 2, 2009
Duration: 1:51

This video provides a detailed guide to field stripping the Ruger P95 pistol, applicable to P93, P94, and P97 models. It emphasizes safety precautions, including working in a well-lit area and wearing safety glasses. The process involves clearing the firearm, removing the slide, and then carefully extracting the recoil spring, guide rod, and barrel from the slide.

Quick Summary

This video demonstrates the field stripping procedure for the Ruger P95 pistol, which also applies to the P93, P94, and P97 models. Essential safety steps include working in a well-lit area, wearing safety glasses, and ensuring the firearm is clear before proceeding with slide and component removal.

Chapters

  1. 00:10Introduction to P-Series
  2. 00:37Safety and Preparation
  3. 00:52Clearing the Firearm
  4. 01:06Slide Removal
  5. 01:22Internal Component Removal
  6. 01:32Conclusion

Frequently Asked Questions

What Ruger P-Series pistols does this disassembly guide apply to?

This disassembly guide for the Ruger P95 also applies to the Ruger P93, P94, and P97 models within the P-Series line. It covers the standard field stripping procedure for routine maintenance.

What are the essential safety steps before disassembling a Ruger P95?

Before disassembly, ensure you work on a clean, flat surface with good lighting. Always wear safety glasses, keep the pistol pointed in a safe direction, and keep your finger off the trigger. Visually confirm the firearm is clear of ammunition.

How do you remove the slide from a Ruger P95?

To remove the slide, first clear the firearm. Push the ejector down into the magazine well, ease the slide forward until index marks align, remove the slide stop, and then pull the slide assembly forward off the frame.

What parts are removed during Ruger P95 field stripping?

Field stripping the Ruger P95 involves removing the slide, recoil spring assembly, guide rod, and barrel from the frame. This allows for routine cleaning and maintenance of the pistol's main components.

Related News

All News →

More Gunsmithing & DIY Videos You Might Like

More from RugerFirearms

View all →