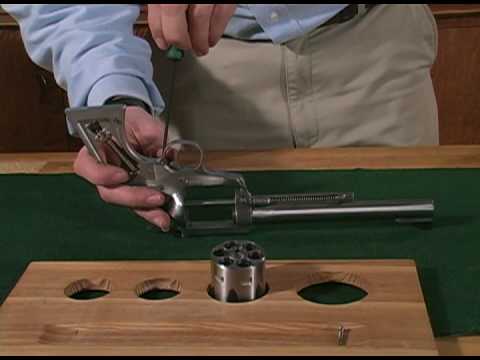
Ruger Mark III Pistol Reassembly

Published on April 21, 2009
Duration: 3:56

This expert-level guide provides a detailed, step-by-step walkthrough for reassembling the Ruger Mark III pistol. It covers crucial safety checks, proper alignment of components like the barrel receiver and mainspring housing, and essential function checks to ensure safe operation. The video emphasizes the importance of specific pin placements and hammer strut alignment, offering insights into potential failure points.

Quick Summary

To reassemble a Ruger Mark III, begin with a thorough safety check, ensuring the firearm is unloaded. Properly align the barrel receiver and bolt, paying attention to the firing pin stop and hammer strut. Complete the mainspring housing assembly and perform a final function check by cycling the bolt and testing the trigger.

Chapters

  1. 00:00Safety Check and Preparation
  2. 01:00Barrel Receiver Installation
  3. 01:36Hammer and Bolt Preparation
  4. 02:00Bolt Insertion and Checks
  5. 02:41Mainspring Housing Assembly
  6. 03:14Final Function Check

Frequently Asked Questions

What are the initial safety steps before reassembling a Ruger Mark III?

Before reassembly, ensure the magazine and receiver are completely unloaded. Set the safety to the off/fire position and confirm the hammer is in the horizontal/cocked position. If the hammer strut is trapped, lift the hammer to free it and point the gun upwards.

How do you properly install the barrel receiver on a Ruger Mark III?

Verify the loaded chamber indicator pin is in place. Engage the barrel receiver lug with the frame's front recess and push rearward until it stops. The receiver should slightly overhang the grip frame. A plastic or wooden mallet can aid alignment if needed.

What is a critical check after reassembling the mainspring housing on a Ruger Mark III?

After reassembling the mainspring housing, pull the bolt back to confirm it opens fully. If it fails to do so, reseat the mainspring housing and ensure the hammer is in the correct forward position before proceeding with further checks.

More Gunsmithing & DIY Videos You Might Like

More from RugerFirearms

View all →