Ruger® SR22® Tech Tips
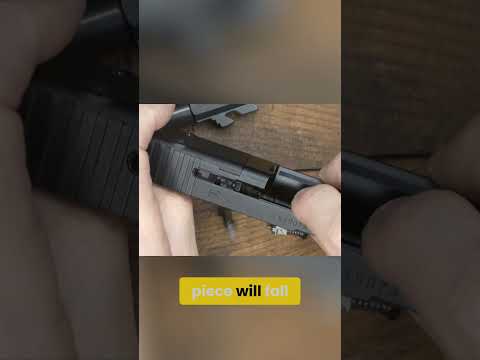
Published on June 10, 2015
Duration: 4:12

This guide details the safe disassembly, cleaning, lubrication, and reassembly of the Ruger SR22 pistol. Key steps include verifying the firearm is unloaded, removing the slide, cleaning components with appropriate solvents and brushes, applying minimal lubrication to specific points, and performing a function test. Proper orientation of the recoil spring is crucial for correct operation.

Quick Summary

To safely disassemble the Ruger SR22, first ensure it's unloaded. Pull down the takedown lever, retract the slide, lift it off the frame, and remove the recoil spring and rod. Clean components with solvent and a brush, lubricate key areas sparingly, and reassemble by reversing the steps.

Chapters

  1. 00:00Introduction and Safety
  2. 00:41Field Stripping / Disassembly
  3. 01:12Recoil Spring Maintenance
  4. 01:47Cleaning Procedures
  5. 02:42Lubrication
  6. 03:00Reassembly
  7. 03:38Function Testing

Frequently Asked Questions

How do you safely disassemble a Ruger SR22 pistol?

First, ensure the SR22 is unloaded by removing the magazine and checking the chamber. Then, pull down the takedown lever in front of the trigger, pull the slide back, lift it up, and remove it from the frame. The recoil rod and spring may come out with the slide.

What are the key cleaning steps for the Ruger SR22?

Clean the bore with a patch and brush. Use a degreaser or solvent to clean the trigger group, feed ramp, and magazine release. Compressed air can remove debris, or allow parts to air dry. A toothbrush helps with stubborn carbon on the rails.

Where should I lubricate my Ruger SR22 after cleaning?

Apply a small amount of oil to the slots in the slide and the bottom of the breech block where the hammer slides. The SR22 requires minimal lubrication for reliable operation.

How do I properly reassemble the Ruger SR22?

Insert the recoil spring into the frame recess. Align the slide, pull it fully back, push down, and let it move forward. Finally, snap the takedown lever back into its locked position.

Related News

All News →

More Gunsmithing & DIY Videos You Might Like

More from RugerFirearms

View all →