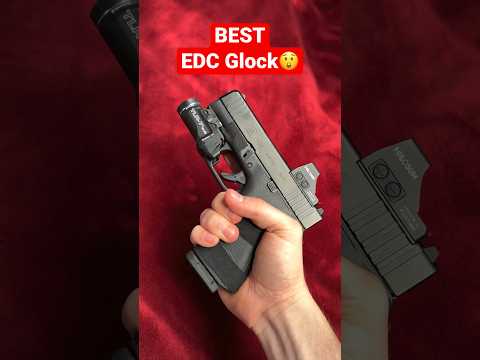
PSA Dagger Micro C-1 | EDC Build - Palmetto State Armory

Published on February 6, 2026
Duration: 4:38

This guide details the installation of an optic and weapon light on the Palmetto State Armory Dagger Micro C-1 for an EDC build. It covers proper optic mounting techniques using Loctite and a torque wrench, along with attaching and testing the Streamlight TLR-7 Sub weapon light. The video emphasizes precision and reliability for concealed carry.

Quick Summary

The PSA Dagger Micro C-1 is optimized for EDC with an integrated compensator for recoil reduction and a 15-round capacity. For mounting optics like the Holosun 507K, use blue Loctite sparingly and a torque wrench to manufacturer specs. The Streamlight TLR-7 Sub is a recommended weapon light that attaches directly to the accessory rail.

Chapters

  1. 00:00Introduction to PSA Dagger Micro C-1 EDC Build
  2. 00:15Dagger Micro C-1 Features: Integrated Compensator
  3. 00:35Optic Selection: Holosun 507K
  4. 01:10Optic Mounting Process Explained
  5. 02:11Light Selection: Streamlight TLR-7 Sub
  6. 02:58Light Mounting and Operation
  7. 03:23Holster Selection and Capacity Discussion

Frequently Asked Questions

What are the key features of the PSA Dagger Micro C-1 for concealed carry?

The PSA Dagger Micro C-1 is designed for EDC with features like an integrated slide compensator to reduce recoil, a factory-cut slide for K-cut/RMSC optics, and a 15-round magazine capacity, offering a slim profile suitable for concealment.

How should I properly mount an optic like the Holosun 507K on my PSA Dagger Micro C-1?

When mounting the Holosun 507K, use a small amount of blue Loctite on the screws to prevent over-tightening. Ensure the optic aligns with the K-cut/RMSC footprint and use a torque wrench to tighten screws to the manufacturer's specifications for optimal reliability.

What weapon light is recommended for the PSA Dagger Micro C-1, and how is it mounted?

The Streamlight TLR-7 Sub is recommended for the PSA Dagger Micro C-1. It mounts directly to the accessory rail and is secured with a screw tightened by a screwdriver or coin. Its push-button controls allow for both momentary and constant-on activation.

Why is using witness marks important when mounting an optic?

Witness marks, typically made with a paint pen on optic mounting screws, serve as a visual indicator. They help confirm that the screws remain tight after installation and subsequent use, ensuring the optic stays securely in place and maintains zero.

Related News

All News →

More EDC & Lifestyle Videos You Might Like

More from Palmetto State Armory

View all →