Super Dirty AR15! How to Clean a Cobalt Kinetics Rifle

Published on November 26, 2022
Duration: 27:46

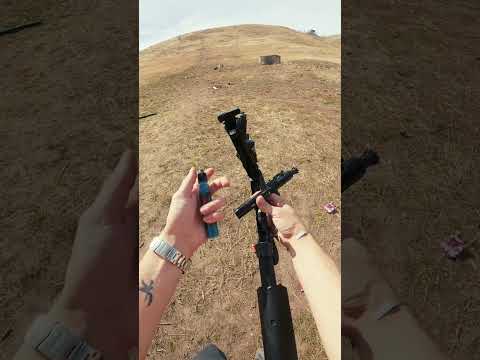
This guide details the process of cleaning a heavily soiled Cobalt Kinetics Pro Series AR-15 rifle. It emphasizes using Radco CLP to break down stubborn carbon buildup on the bolt carrier group, bolt, and upper receiver. The instructor highlights the importance of inspecting critical components like the bolt, cam pin, and firing pin for cracks or damage, and demonstrates a simplified cleaning method using common household items alongside specialized CLP.

Quick Summary

Cleaning a heavily fouled AR-15 like the Cobalt Kinetics Pro Series involves using a strong CLP like Radco CLP to break down carbon buildup on the bolt carrier group and bolt. Essential tools include rags, popsicle sticks, and skewers. Always ensure the firearm is unloaded, and critically inspect the firing pin, cam pin, and bolt for any signs of cracking or damage before reassembly.

Chapters

  1. 00:00Introduction & Dirty Rifle
  2. 00:41Unloading and Safety Check
  3. 00:50Disassembling Upper and Lower Receivers
  4. 01:08Inspecting the Dirty Upper Receiver
  5. 01:32Round Count and Reliability
  6. 02:22Cleaning Supplies and Tools
  7. 03:46Soaking the Bolt Carrier Group with CLP
  8. 04:01Disassembling the Bolt Carrier Group
  9. 05:01Identifying the Cam Pin
  10. 05:20Critical Component Inspection: Firing Pin & Cam Pin
  11. 06:09Cleaning the Bolt Carrier Group
  12. 07:27Cleaning the Firing Pin and Charging Handle
  13. 08:04Cleaning Charging Handle Wear Spots
  14. 09:56Inspecting the Cam Pin for Wear
  15. 10:46Cleaning the Lower Receiver
  16. 11:20Inspecting Lower Receiver Components
  17. 12:03Lubricating Trigger Components
  18. 13:09Lower Receiver Cleaning Status
  19. 14:04Cleaning the Upper Receiver Interior
  20. 14:35Soaking the Upper Receiver
  21. 14:46Cleaning the Bolt After Soaking
  22. 15:12Bolt Inspection: Gas Rings, Extractor, Ejector
  23. 16:06Bolt Failure Points
  24. 17:27Restoring the Bolt's Finish
  25. 19:15Stubborn Carbon Removal
  26. 19:53Upper Receiver Cleaning Recap
  27. 20:43Disgusting Upper Receiver Grime
  28. 21:22Using a Bore Brush for the Upper
  29. 22:34Upper Receiver Cleaning Complete
  30. 22:46Reassembly: Lubricating the Bolt
  31. 23:02Bolt Carrier Group Orientation
  32. 23:55Installing the Cam Pin
  33. 24:24Installing the Firing Pin
  34. 24:48Lubricating the Charging Handle
  35. 25:22Lubricating Bolt Carrier Group Wear Points
  36. 26:10Reinserting Bolt Carrier Group
  37. 26:26Closing Takedown Pins
  38. 26:34Post-Cleaning Assessment
  39. 26:43Final Rifle Status
  40. 27:05Product Recommendation & Giveaways
  41. 27:32Outro

Frequently Asked Questions

What are the essential tools for cleaning a dirty AR-15?

For a heavily fouled AR-15, essential cleaning tools include a good CLP like Radco CLP, T-shirt rags for wiping, a popsicle stick for scraping, a skewer for tight spots, and a toothbrush for stubborn grime. A large bore brush can also be helpful for the upper receiver.

How often should an AR-15 be cleaned?

While daily or frequent cleaning is ideal, this video shows a Cobalt Kinetics AR-15 running reliably after an estimated 7,000-8,000 rounds without cleaning. The instructor suggests cleaning when it's needed or when time permits, emphasizing that the rifle still functions as long as it's lubed.

What are the critical components to inspect on an AR-15 bolt carrier group?

When cleaning an AR-15 bolt carrier group, it's crucial to inspect the firing pin for tip damage, the cam pin for cracks (especially around the firing pin hole), and the bolt itself for cracks, particularly around the cam pin hole. Also check the gas rings for breaks or missing pieces.

How does Radco CLP help in cleaning a dirty AR-15?

Radco CLP is effective for cleaning a dirty AR-15 because it breaks down carbon buildup on components like the bolt carrier group and bolt. This allows for easier removal of fouling with simple tools like rags and popsicle sticks, making the cleaning process more efficient.

What is the correct orientation for the bolt carrier group extractor during reassembly?

During AR-15 bolt carrier group reassembly, it is critical to ensure the extractor is oriented towards the ejection port. This ensures that spent casings are properly ejected from the firearm after firing, preventing malfunctions.

Related News

All News →

More Training & Techniques Videos You Might Like

More from Farewell Firearms Training

View all →