History of WWI Primer 132: Danish Krag–Jørgensen 1889/10 Documentary

Published on October 29, 2020
Duration: 70:00

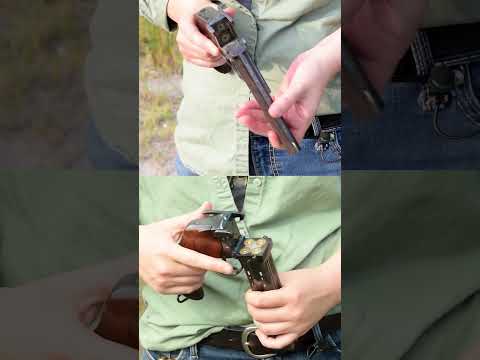
This video provides a detailed guide to disassembling and reassembling the bolt of the Danish Krag-Jørgensen 1889/10 rifle. It covers the unique features of the bolt, including its cocking piece, firing pin, extractor, and locking lugs, offering insights into its design and maintenance. The process is demonstrated step-by-step, emphasizing the simplicity and robustness of the mechanism.

Quick Summary

Disassembling the Danish Krag-Jørgensen 1889/10 bolt involves removing it from the receiver, then separating the cocking piece and firing pin assembly. Reassembly reverses these steps, utilizing serrations on the cocking shroud for easier manipulation.

Chapters

  1. 00:00:00Introduction to the Danish Krag-Jørgensen
  2. 00:25:00Rifle Overview and Specifications
  3. 00:37:00Historical Context: Danish Rifle Development
  4. 00:45:00Ole Krag and Erik Jørgensen: The Inventors
  5. 01:10:00Magazine Development: From Lee to Krag-Jørgensen
  6. 01:35:00Prototype Testing and Refinement
  7. 02:10:00The 8mm Danish Cartridge
  8. 02:25:00Adoption and Production of the Gewehr 1889
  9. 02:35:00Detailed Examination: Barrel Jacket and Sights
  10. 02:45:00Bolt Design and Functionality
  11. 03:00:00Bolt Disassembly and Reassembly
  12. 03:15:00Magazine Mechanism Explained
  13. 03:45:001910 Upgrades: Spitzer Cartridge and Safety
  14. 04:00:00Serial Production and Bayonet Design
  15. 04:10:00Military Expansion and Rifle Service
  16. 04:25:00Comparison: Danish Krag vs. US Krag
  17. 04:40:00Shooting Impressions and Handling
  18. 05:00:00Final Thoughts and Reliability

Frequently Asked Questions

How do you disassemble the bolt of a Danish Krag-Jørgensen 1889/10 rifle?

To disassemble the bolt, first remove it from the receiver. Then, push the cocking piece back slightly and rotate the bolt body to free it. Further disassembly involves pushing the cocking piece to release the firing pin and main spring. Reassembly is the reverse process.

What are the key features of the Danish Krag-Jørgensen 1889/10 bolt?

The bolt is designed for simplicity, featuring a one-unit removal, front locking lugs, a guide lug, and an overhead extractor with a camming surface. It also includes serrations on the cocking shroud to aid in reassembly.

What is the purpose of the serrations on the Danish Krag-Jørgensen bolt's cocking shroud?

The serrations on the cocking shroud are specifically designed to provide grip during reassembly. They allow the user to more easily compress the spring and rotate the shroud back into its correct position.

How does the Danish Krag-Jørgensen bolt engage the receiver?

The bolt engages the receiver using a front locking lug that turns into a mortise and a guide lug that runs against the receiver. The bolt handle root also serves as a backup locking surface.

More Gunsmithing & DIY Videos You Might Like

More from C&Rsenal

View all →