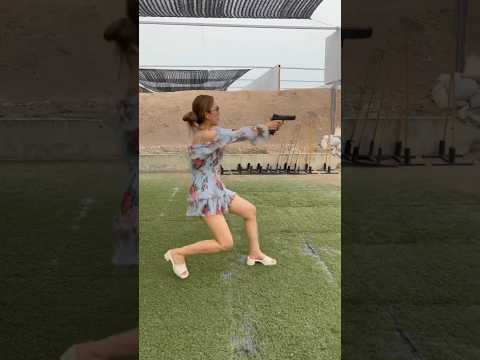
AP5 9 mm

Published on April 27, 2023
Duration: 0:28

This guide details a technique for engaging targets with the Century Arms AP5 9mm, emphasizing controlled single shots and rapid-fire strings. It highlights the importance of recoil management, stability, and proper firearm clearing procedures after use. The demonstration showcases an experienced shooter's proficiency.

Quick Summary

The Century Arms AP5 9mm features a roller-delayed blowback operating system, demonstrated here for effective target engagement. An experienced shooter showcases controlled single shots for accuracy and rapid-fire strings for stability, emphasizing safe muzzle discipline and efficient clearing procedures.

Chapters

  1. 00:00Introduction and Approach
  2. 00:03Controlled Single Shots
  3. 00:17Rapid Fire Demonstration
  4. 00:24Reload and Clear

Frequently Asked Questions

What is the operating system of the Century Arms AP5 9mm?

The Century Arms AP5 9mm utilizes a roller-delayed blowback operating system. This mechanism uses rollers to delay the bolt's opening, contributing to stability during firing, especially in rapid-fire scenarios.

How does the shooter demonstrate proficiency with the AP5 9mm?

The shooter demonstrates proficiency through controlled single shots for accuracy, rapid-fire strings showing stability, efficient magazine changes, and maintaining safe muzzle discipline throughout the engagement.

What are the key techniques shown for target engagement with the AP5 9mm?

Key techniques include approaching the firing line safely, engaging steel targets with controlled fire for accuracy, and executing rapid-fire strings while maintaining stability and recoil management.

What safety procedures are highlighted after the course of fire?

After the course of fire, the shooter demonstrates proper firearm clearing by removing the magazine and visually and physically inspecting the chamber to ensure it is unloaded.

Related News

All News →

More Training & Techniques Videos You Might Like

More from Naaming Kotchanok

View all →