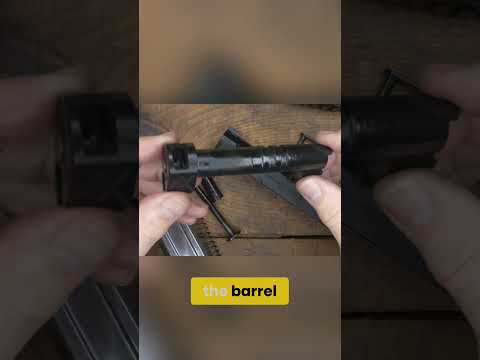
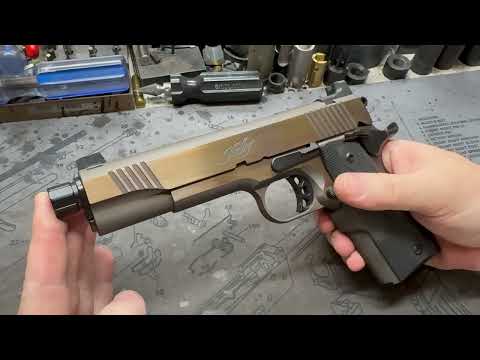
1911 - Detailed Disassembly

Published on April 27, 2013
Duration: 11:14

This video provides a comprehensive, step-by-step guide to the detailed disassembly of a 1911 pistol, covering both slide and frame components. It emphasizes the use of specialized tools and highlights safety precautions, particularly when dealing with spring tension. The guide details the removal of internal parts like the firing pin stop, sear, and disconnector, offering insights into the Series 80 safety mechanism.

Quick Summary

A detailed 1911 disassembly requires specific tools like punches, screwdrivers, and a magnetic bowl. The process involves removing the slide stop by aligning it with the takedown notch, then disassembling internal slide parts like the recoil spring and barrel bushing. Frame disassembly includes removing safeties, pins, and internal components like the sear and hammer.

Chapters

  1. 00:00Introduction and Tools
  2. 01:26Slide Disassembly
  3. 03:40Internal Slide Components
  4. 06:22Frame Disassembly: Grips and Mainspring
  5. 08:50Internal Frame Components

Frequently Asked Questions

What tools are needed for a detailed 1911 disassembly?

Essential tools include a brass/nylon hammer, small and brass punches, tweezers, grease, specific screwdrivers for grip screws and the magazine catch, and a magnetic bowl to prevent losing small parts. A bushing wrench is also highly recommended for easier disassembly.

How do you remove the slide from a 1911 frame?

After removing the magazine and ensuring the pistol is safe, align the slide stop with the frame's takedown notch. Once aligned, the slide stop can be pushed out, allowing the slide to separate from the frame.

What is the Series 80 firing pin safety, and how does it affect disassembly?

The Series 80 safety is an internal mechanism. To disassemble the firing pin components, you must depress the plunger for this safety to release the firing pin stop, allowing access to the firing pin and its spring.

What are the key internal components of the 1911 frame that need removal?

After removing grips and the mainspring housing, you'll remove the thumb safety and grip safety. Then, push out the hammer pin and sear pin to release the hammer, sear, and disconnector. Finally, the magazine catch and trigger can be removed.

Related News

All News →

More Gunsmithing & DIY Videos You Might Like

More from nsz85

View all →